What is included?
Star TSP100 (TSP143) LAN Printer
- Printer
- 1.8m Power Cables
- Vertical Wall Mount Kit
- Sample Paper Roll
- 58mm Paper Guide
- Power Switch Cover
- Set Up Instructions
- 1m LAN / Ethernet Cable
Printer Features
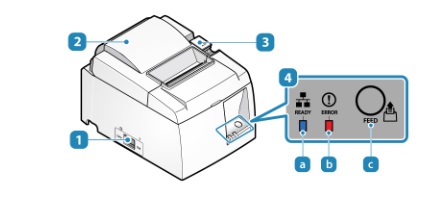
- Power switch - Turns the power on/off.
- Rear cover - Opens/Closes when setting the paper roll.
- Opening lever - Push this lever to open the rear cover when setting the paper roll.
- Operation panel - There is a lamp indicating the status of the printer and a switch to operate the printer.
(a)READY LED (blue)
(b)ERROR LED (red)
(c)FEED button: Use this button when self-printing.
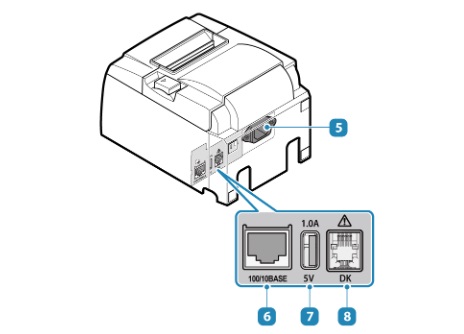
- Power socket - Connects the power cable that comes with the main unit.
- LAN connector - Connects the LAN cable that comes with the main unit.
- USB port 1.0A - It is possible to provide power to USB devices such as a tablet.
- Connector to drive external device - This is a drive circuit to operate the cash drawer and external buzzer (options) and such.
How to Connect to the Network and POS System?
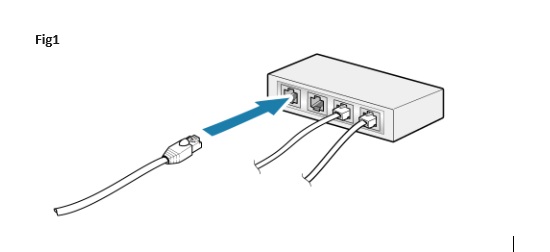
- Connect the LAN cable to the network. (fig1)
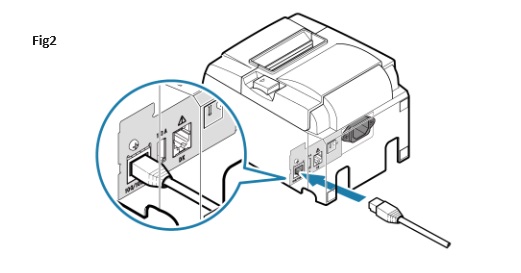
Connect one side of the LAN cable to the hub/router. - Connect the LAN Cable to the printer. (fig2)
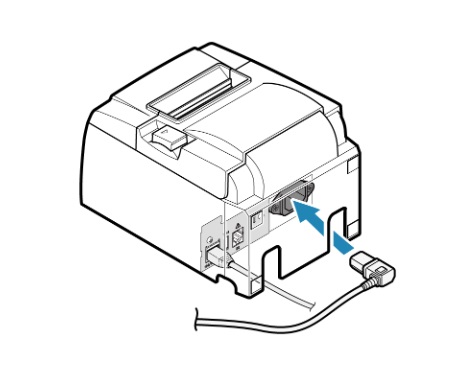
Connect the other side of the LAN cable to the LAN connector of the printer. - Connect power cable
Take note of the direction of the power socket and connect the power cable.
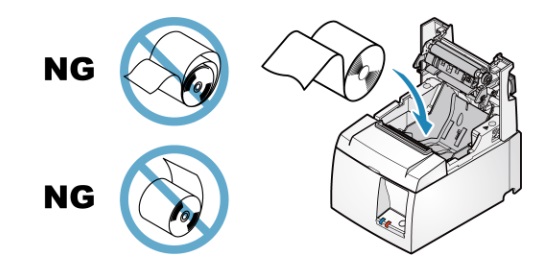
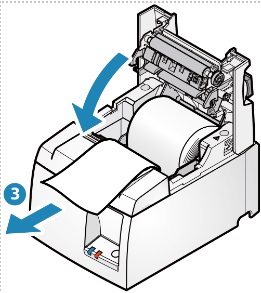
Paper Set Up
- Open printer cover - Push the opening lever to open the printer cover.
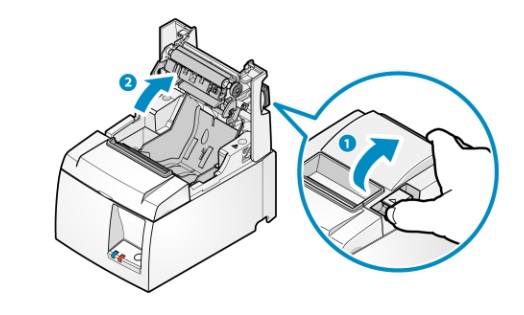
- Set the paper roll in the direction as shown in the illustration.