How to Connect to the Network and POS System
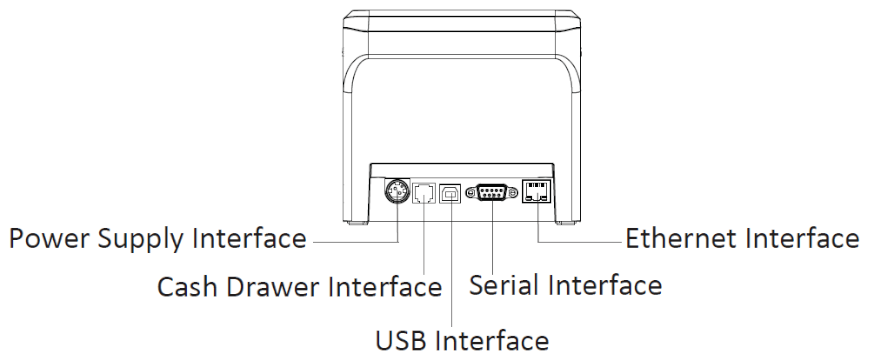
Thermal Lan Printer – TP40 Onix
Connect one side of the Ethernet cable to the Ethernet interface of the printer (TP40) and the other side to the router or Network Socket. Connect the power cable as described above (Thermal Receipt Printer – TP40 Onix)
Finding the IP Address of the Printer (TP40 Onix)
- Make sure the Ethernet Cable is connected correctly.
- Make sure the power cable is connected correctly.
- Make sure the printer is switched off
- Press the feed button and then switch on the printer
- When the printer starts printing, remove your hands from the feed button
- 2 sets of receipt will be printed. 2nd receipt will take a few seconds to get printed. On the 2nd receipt you will see the IP address of the printer.
- Use the IP address to configure the Printer on the POS system using the following steps
Go to Control Panel and Select Devices and Printers

Click on Add a printer and new screen opens

Click on the link selected below
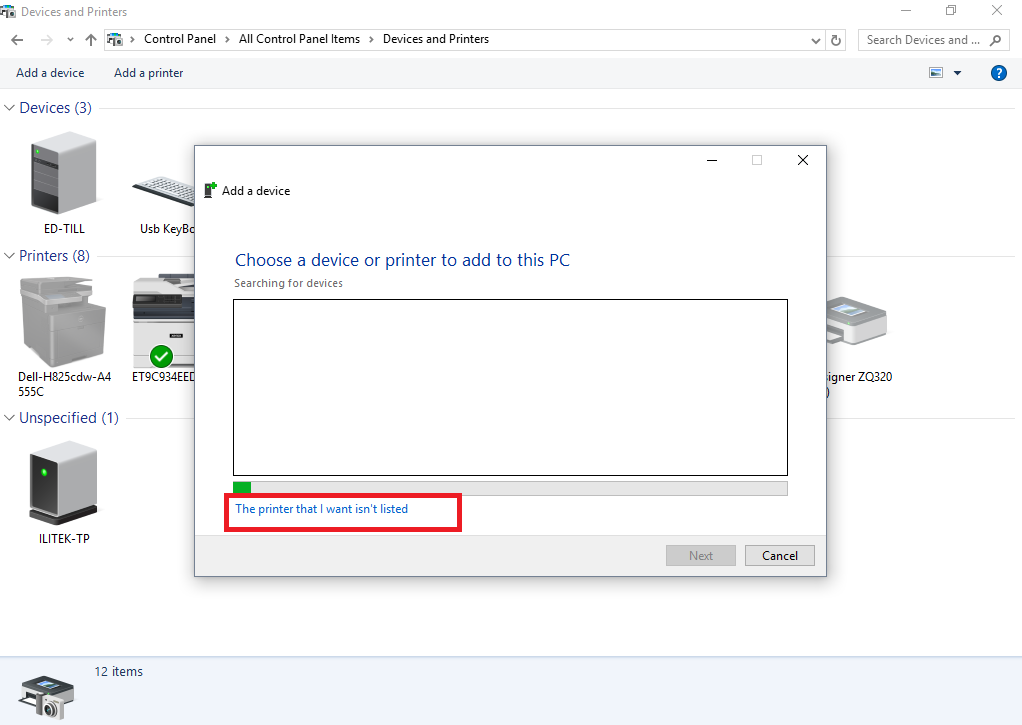
Select the radio button below in the red box and click Next
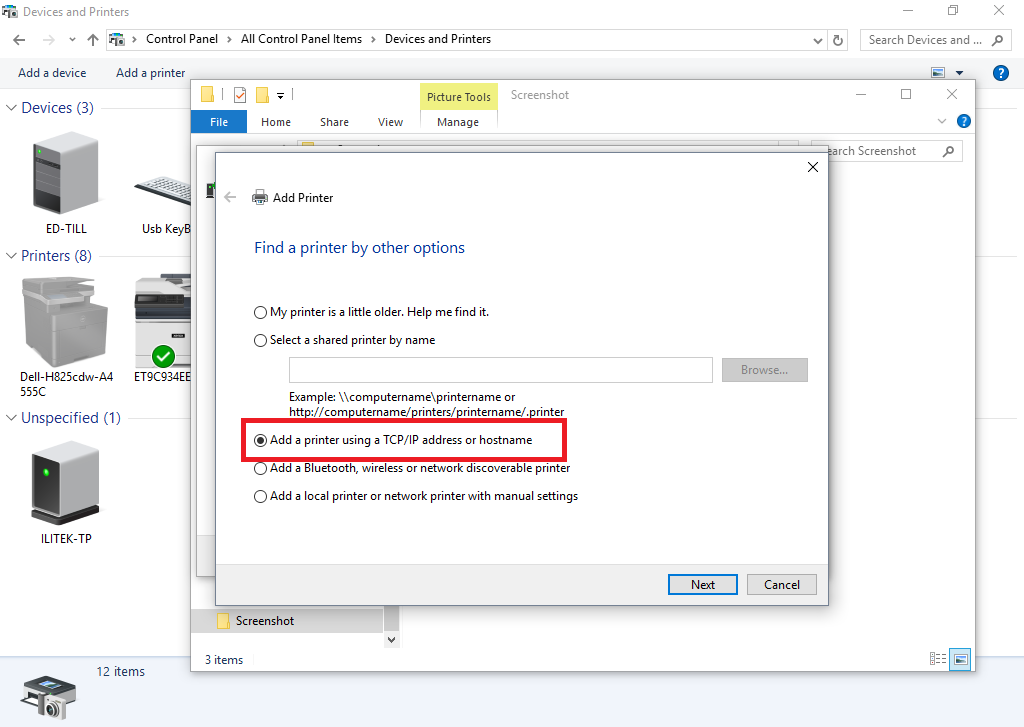
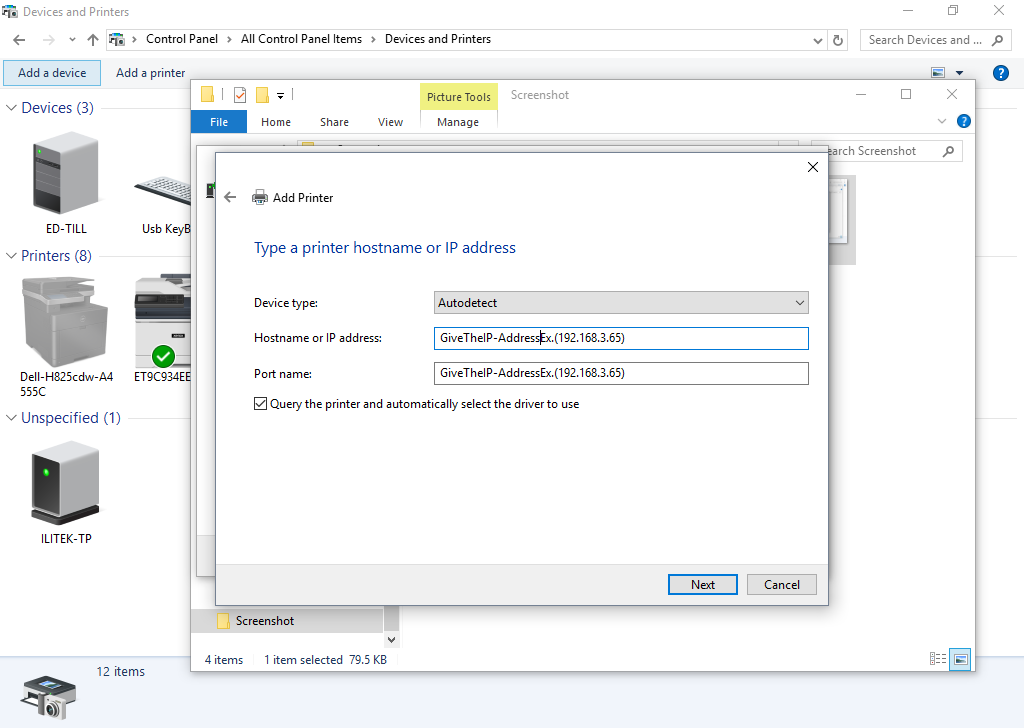
In the Hostname or IP address box enter the IP address of the printer which you found. Click Next
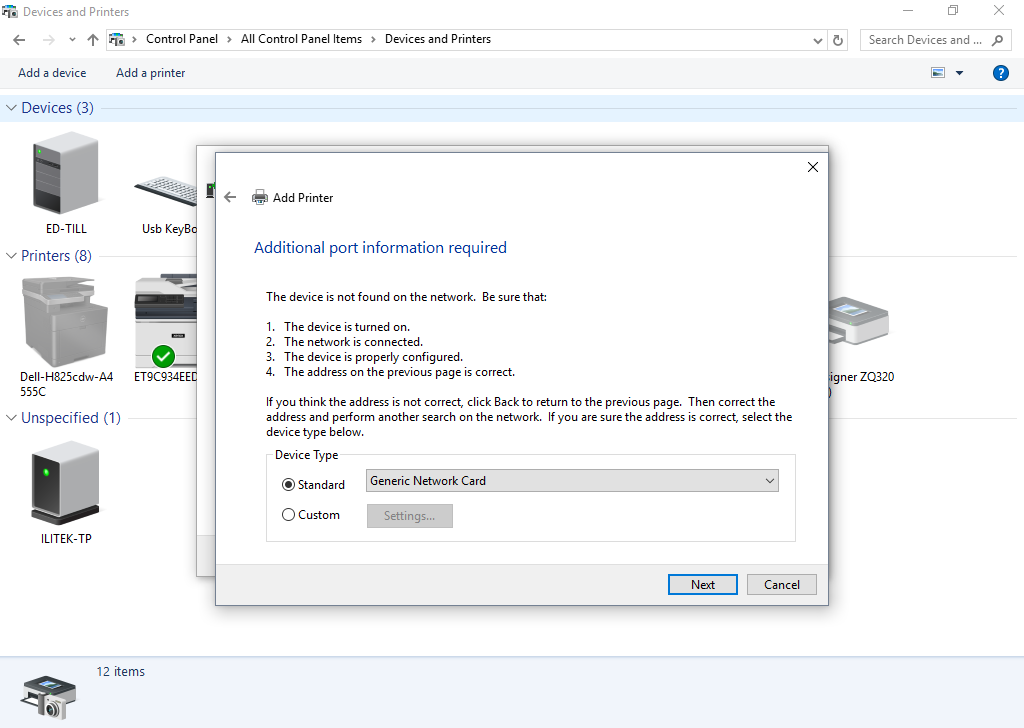
Click Next
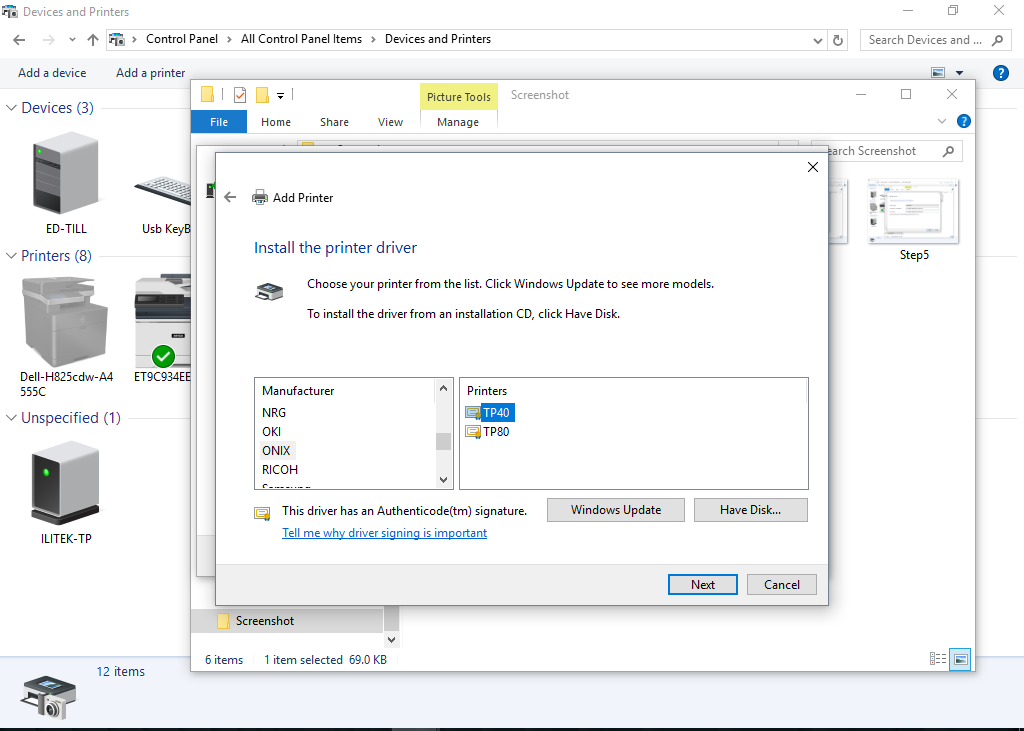
Select the ONIX and TP40 as the printer and click Next
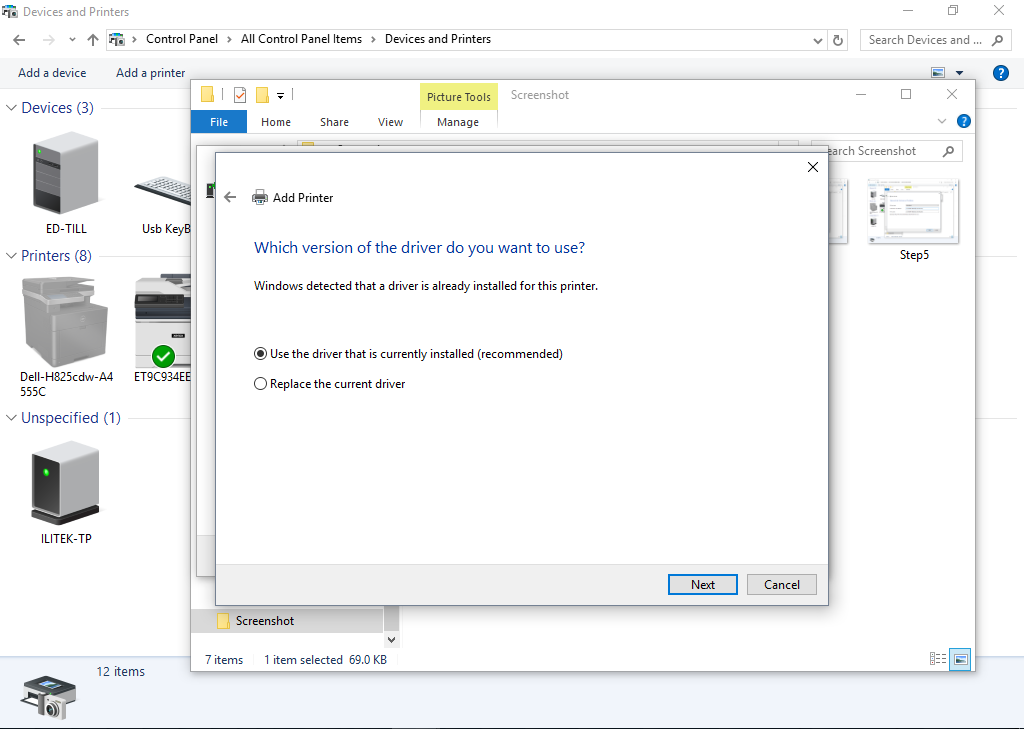
In screen below select the radio button (Use the driver that is currently installed and click Next
Type the name of the Printer. Name should be Star Kitchen Printer and Click Next
