What is included?
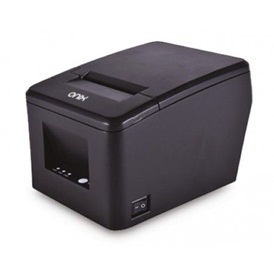
Thermal Receipt Printer – TP40 Onix
- Printer
- USB Cable
- Power Cord
- Power Adaptor
- Serial Cable
- Quick Start Guide
- CD
- Paper Roll
Features
- 80mm thermal printer
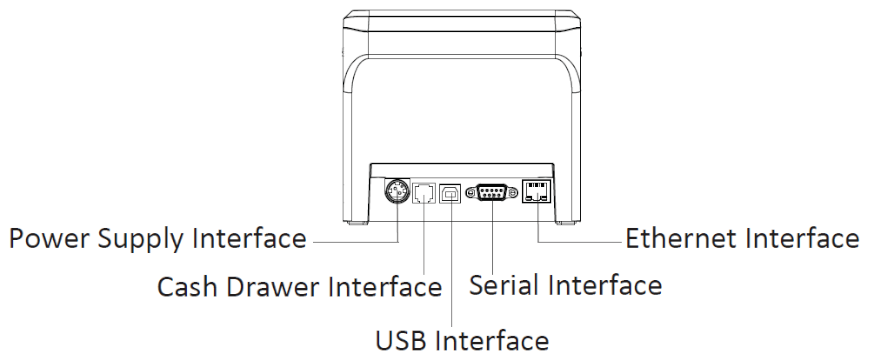
- USB/RS232/LAN connectors
- Printing 72mm - 576 dots
- Windows, Linux, OPOS compatible
How to connect to the Power Supply?
- Make sure the printer power is turned off
- Connect power adaptor to printer
- Connect power adaptor to power cord
- Plug the other side of power cord into the socket outlet.
Cash Drawer connection to printer
Connect the interface cable which is connected to the cashdrawer to the receipt printer cash drawer interface (this will usually look like a telephone connector).
Ensure that your interface cable is properly connected to both your printer and cash drawer. If it looks properly connected, try unplugging and reconnecting both sides of the cable.
How to connect to the EPOS Till?
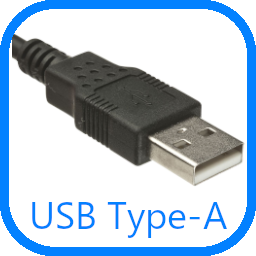
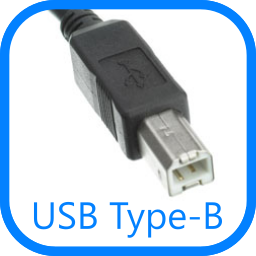
- Get the USB cable
- Connect the A side of the USB cable into the USB port of EPOS Till. Connect the B side of the USB cable to the Printer
- Connect power adaptor to power cord
- Plug the other side of power cord into the socket outlet.
Paper Loading
- Press the cover open button to open the top cover (see image below)
- Remove the used roll paper core, if any
- Install the roll paper in the correct direction of the roll paper. (see image below)
- Pull out some roll paper, and close the top cover
- Tear the extra paper of the printer